Series: Setting up Oracle Cloud VM - IV

This is a continuation from: [[003 Creating Traefik VM Instance]]
✅ Step 4: Connecting via SSH and setting up Traefik
🛠️ 4.1: SSH into VM Instance
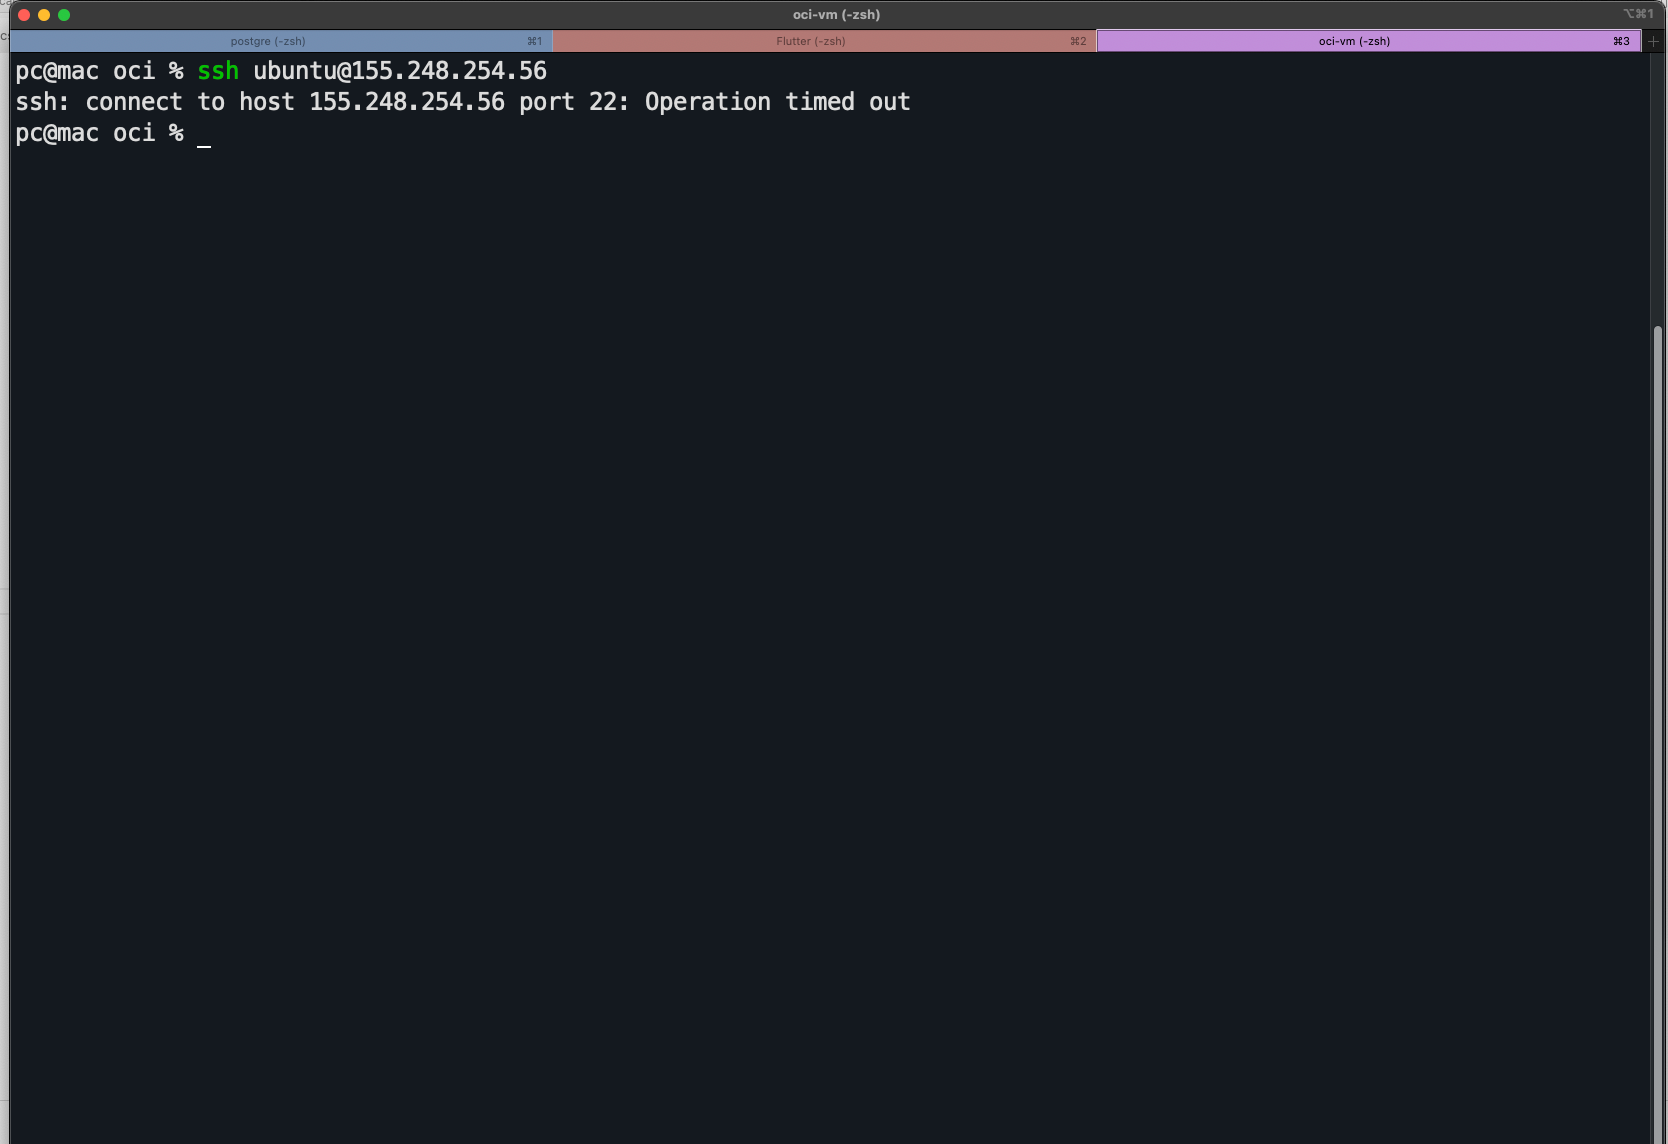
Once the VM is ready and has public IP assigned:
ssh -i ~/.ssh/oci-traefik.pem ubuntu@<public-ip>
✅ Step 4.1.1: Enable Internet access to VM
From your VM's details page, click on Connect under "Connect public subnet to internet"
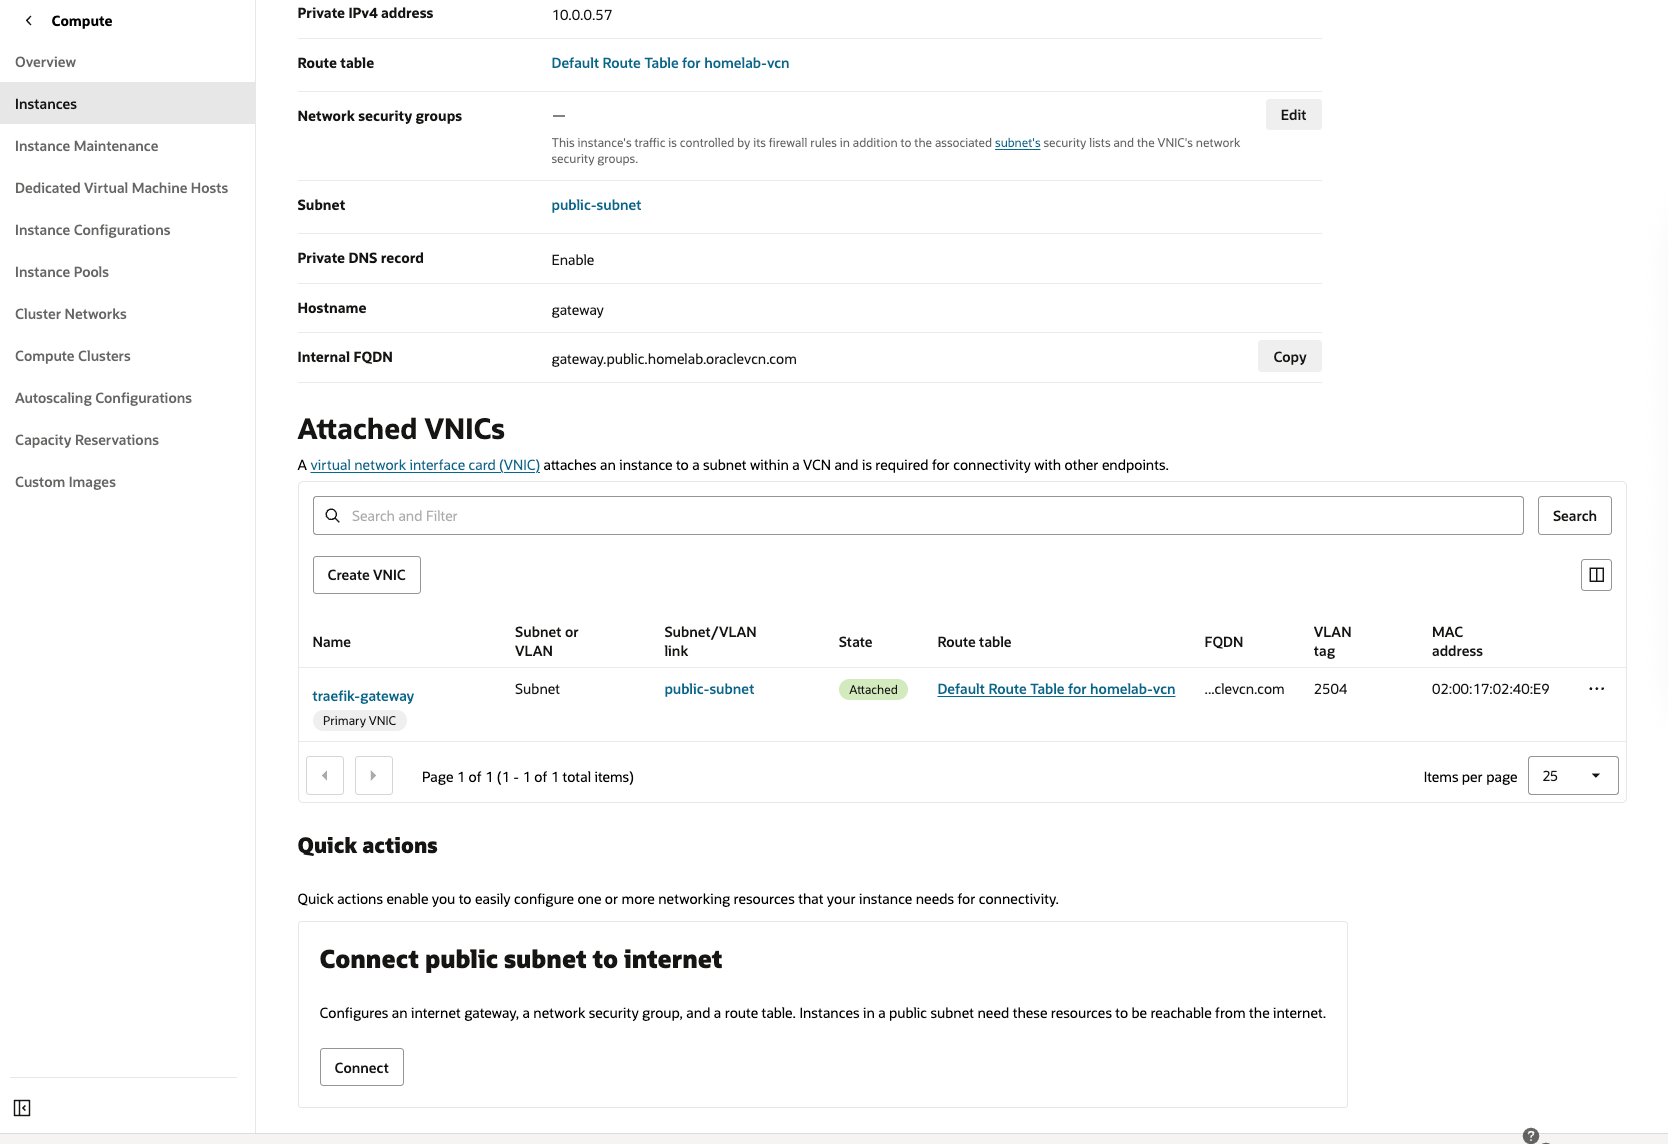
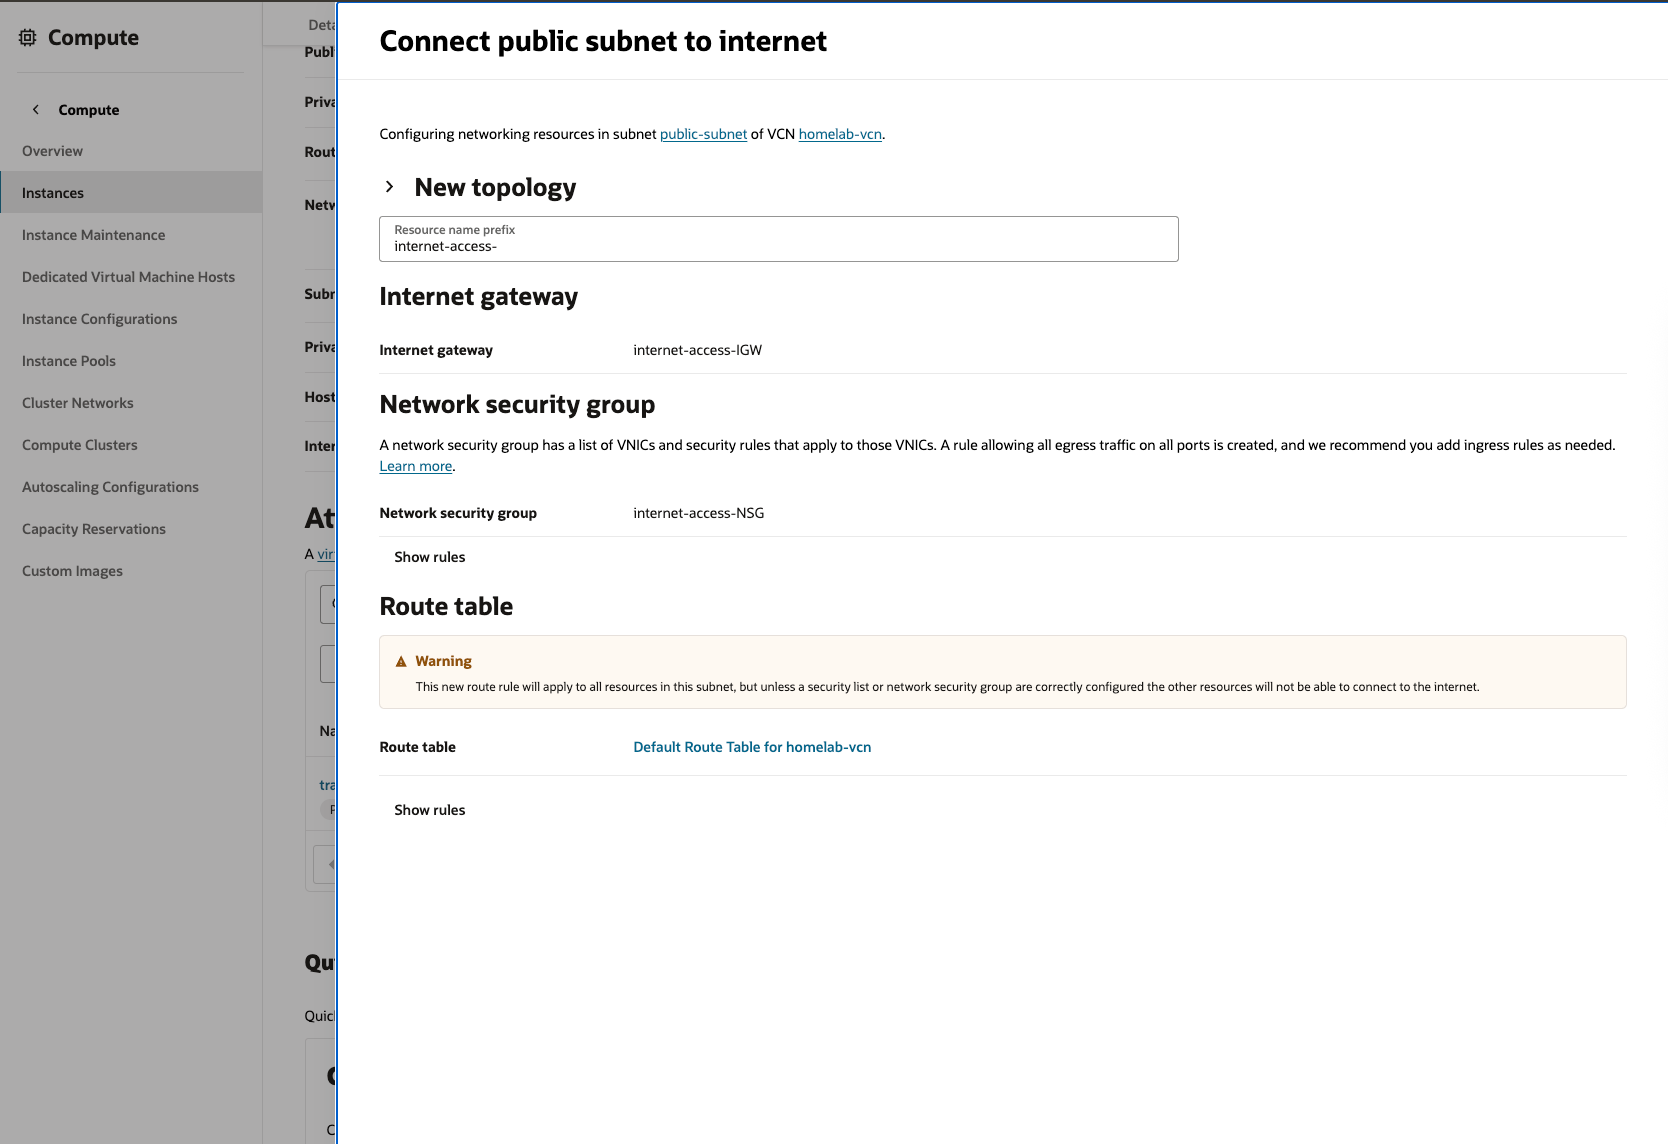
This creates a new NSG(Network Security Group) and configures route table to allow internet access. The VM details page now shows the newly configured NSG.
✅ Step 4.1.2: Configure SSH
If you downloaded an SSH key during VM creation but haven’t used or configured it yet, here’s exactly how to set it up and connect.
✅ Step-by-Step: Use the Downloaded SSH Private Key
When you created the VM, if you selected:
Generate a key pair for me
Oracle Cloud provided:
- A
.keyfile (private key, e.g.,ssh-key-2025-07-07.key) — you should have downloaded it - The public key was automatically set up on the VM
🔐 Step 1: Move the Key to .ssh and Secure It
Let’s assume the key was saved to your Downloads folder:
mv ~/Downloads/ssh-key-2025-07-07.key ~/.ssh/traefik.pem
chmod 600 ~/.ssh/traefik.pem
This ensures the key has correct permissions (very important — SSH will reject loose keys).
🔌 Step 2: Connect via SSH
Now SSH into the VM using:
ssh -i ~/.ssh/traefik.pem ubuntu@<your-public-ip>
Replace<your-public-ip>with the IP of your instance The username isubuntufor Ubuntu images
✅ If It Works:
You’ll get a prompt like:
Welcome to Ubuntu 22.04 LTS...
ubuntu@traefik-gateway:~$
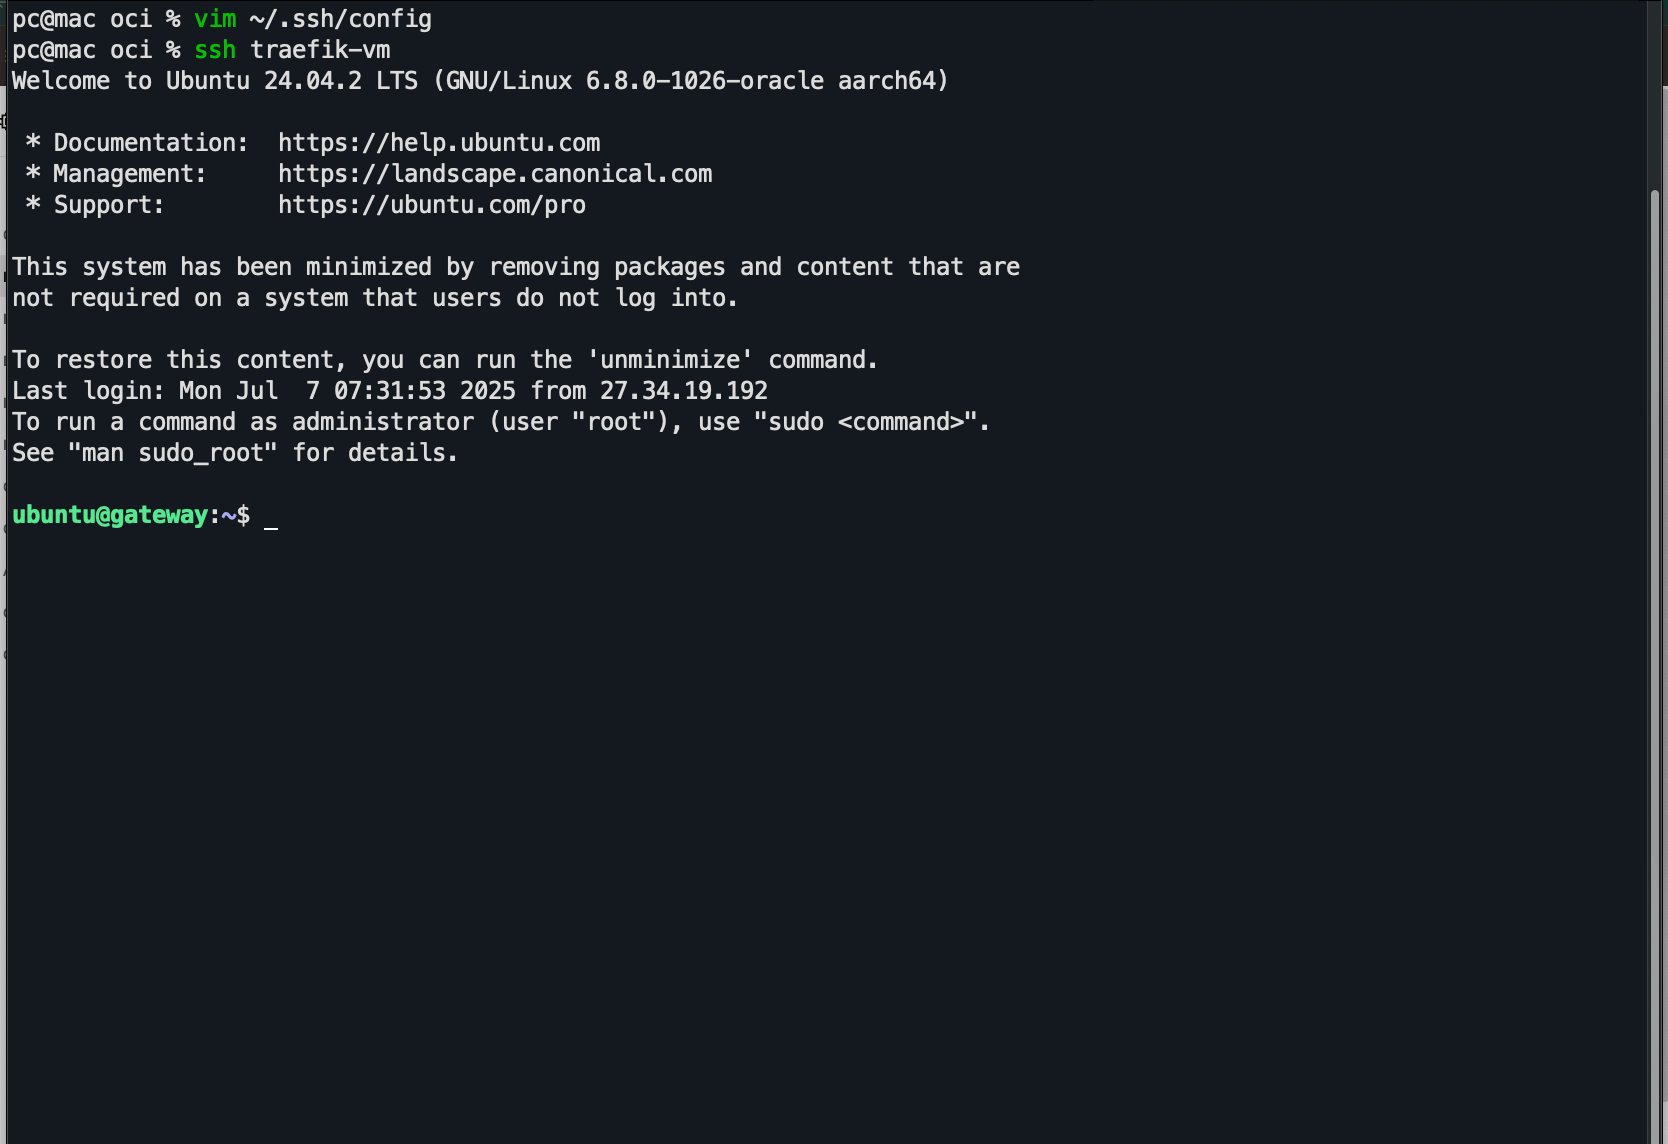
🧠 Optional: Create a Shortcut in ~/.ssh/config
For easier access in the future:
nano ~/.ssh/config
Add:
Host traefik-vm
    HostName <your-public-ip>
    User ubuntu
    IdentityFile ~/.ssh/traefik.pem
Then you can connect with:
ssh traefik-vm
✅ Summary
| Step | Command |
|---|---|
| Move key | mv ~/Downloads/*.key ~/.ssh/traefik.pem |
| Fix perms | chmod 600 ~/.ssh/traefik.pem |
| Connect | ssh -i ~/.ssh/traefik.pem ubuntu@<ip> |
| Optional config | ~/.ssh/config shortcut |
🔁 4.2: Disable Source/Destination Check
- In the OCI Console → Go to your Traefik VM
- Under Resources, click Attached VNICs
- Click on the VNIC (
nic0) - Click Edit
- Check ✅ Skip Source/Destination Check
- Save
✅ 4.3: Install Docker + Docker Compose
# Update and upgrade packages
sudo apt update && sudo apt upgrade -y

# Install Docker
curl -fsSL https://get.docker.com -o get-docker.sh
sh get-docker.sh

# Add current user to Docker group so no need for sudo
sudo usermod -aG docker $USER
newgrp docker

# Install Docker Compose plugin (Compose v2)
sudo apt install docker-compose-plugin -y

# Enable Docker to start on boot
sudo systemctl enable docker
✅ Confirm installation:
docker --version
docker compose version
✅ 4.4: Create Folder for Traefik
mkdir -p ~/traefik
cd ~/traefik
We’ll place:
docker-compose.ymltraefik.yml(Traefik config)acme.json(for Let's Encrypt certs)- Any dynamic routing config
🔒 4.5: Setup Basic Firewall (UFW)
If you want to restrict ports early:
sudo apt install ufw -y
sudo ufw allow OpenSSH
sudo ufw allow 80
sudo ufw allow 443
sudo ufw enable
✅ Recap
| Task | Status |
|---|---|
| SSH access working | ✅ |
| Docker & Compose installed | ✅ |
| Traefik folder initialized | ✅ |
| Docker enabled on boot | ✅ |
| Firewall (UFW) secured (optional) | ✅ |
✅ You’re now ready to move into:
🧱 3.5: Setup Folder Structure for Traefik
mkdir -p ~/traefik
cd ~/traefik
See you in next part: [[005 Setting up Traefik and reverse proxy]]